How Product Sections Work
A product section is a composable container that you build by adding snippets — small, modular components that each display a specific piece of product information. You choose which snippets to include, arrange their order, and configure each one individually.Add a Product section
Open the sections panel and select the Product Details category. Click the Product section to add it to your canvas.
Link a Shopify product
In the Section Settings panel (right sidebar), use the product dropdown to search and select a product from your connected Shopify store. The section will pull in that product’s data automatically.
Add and arrange snippets
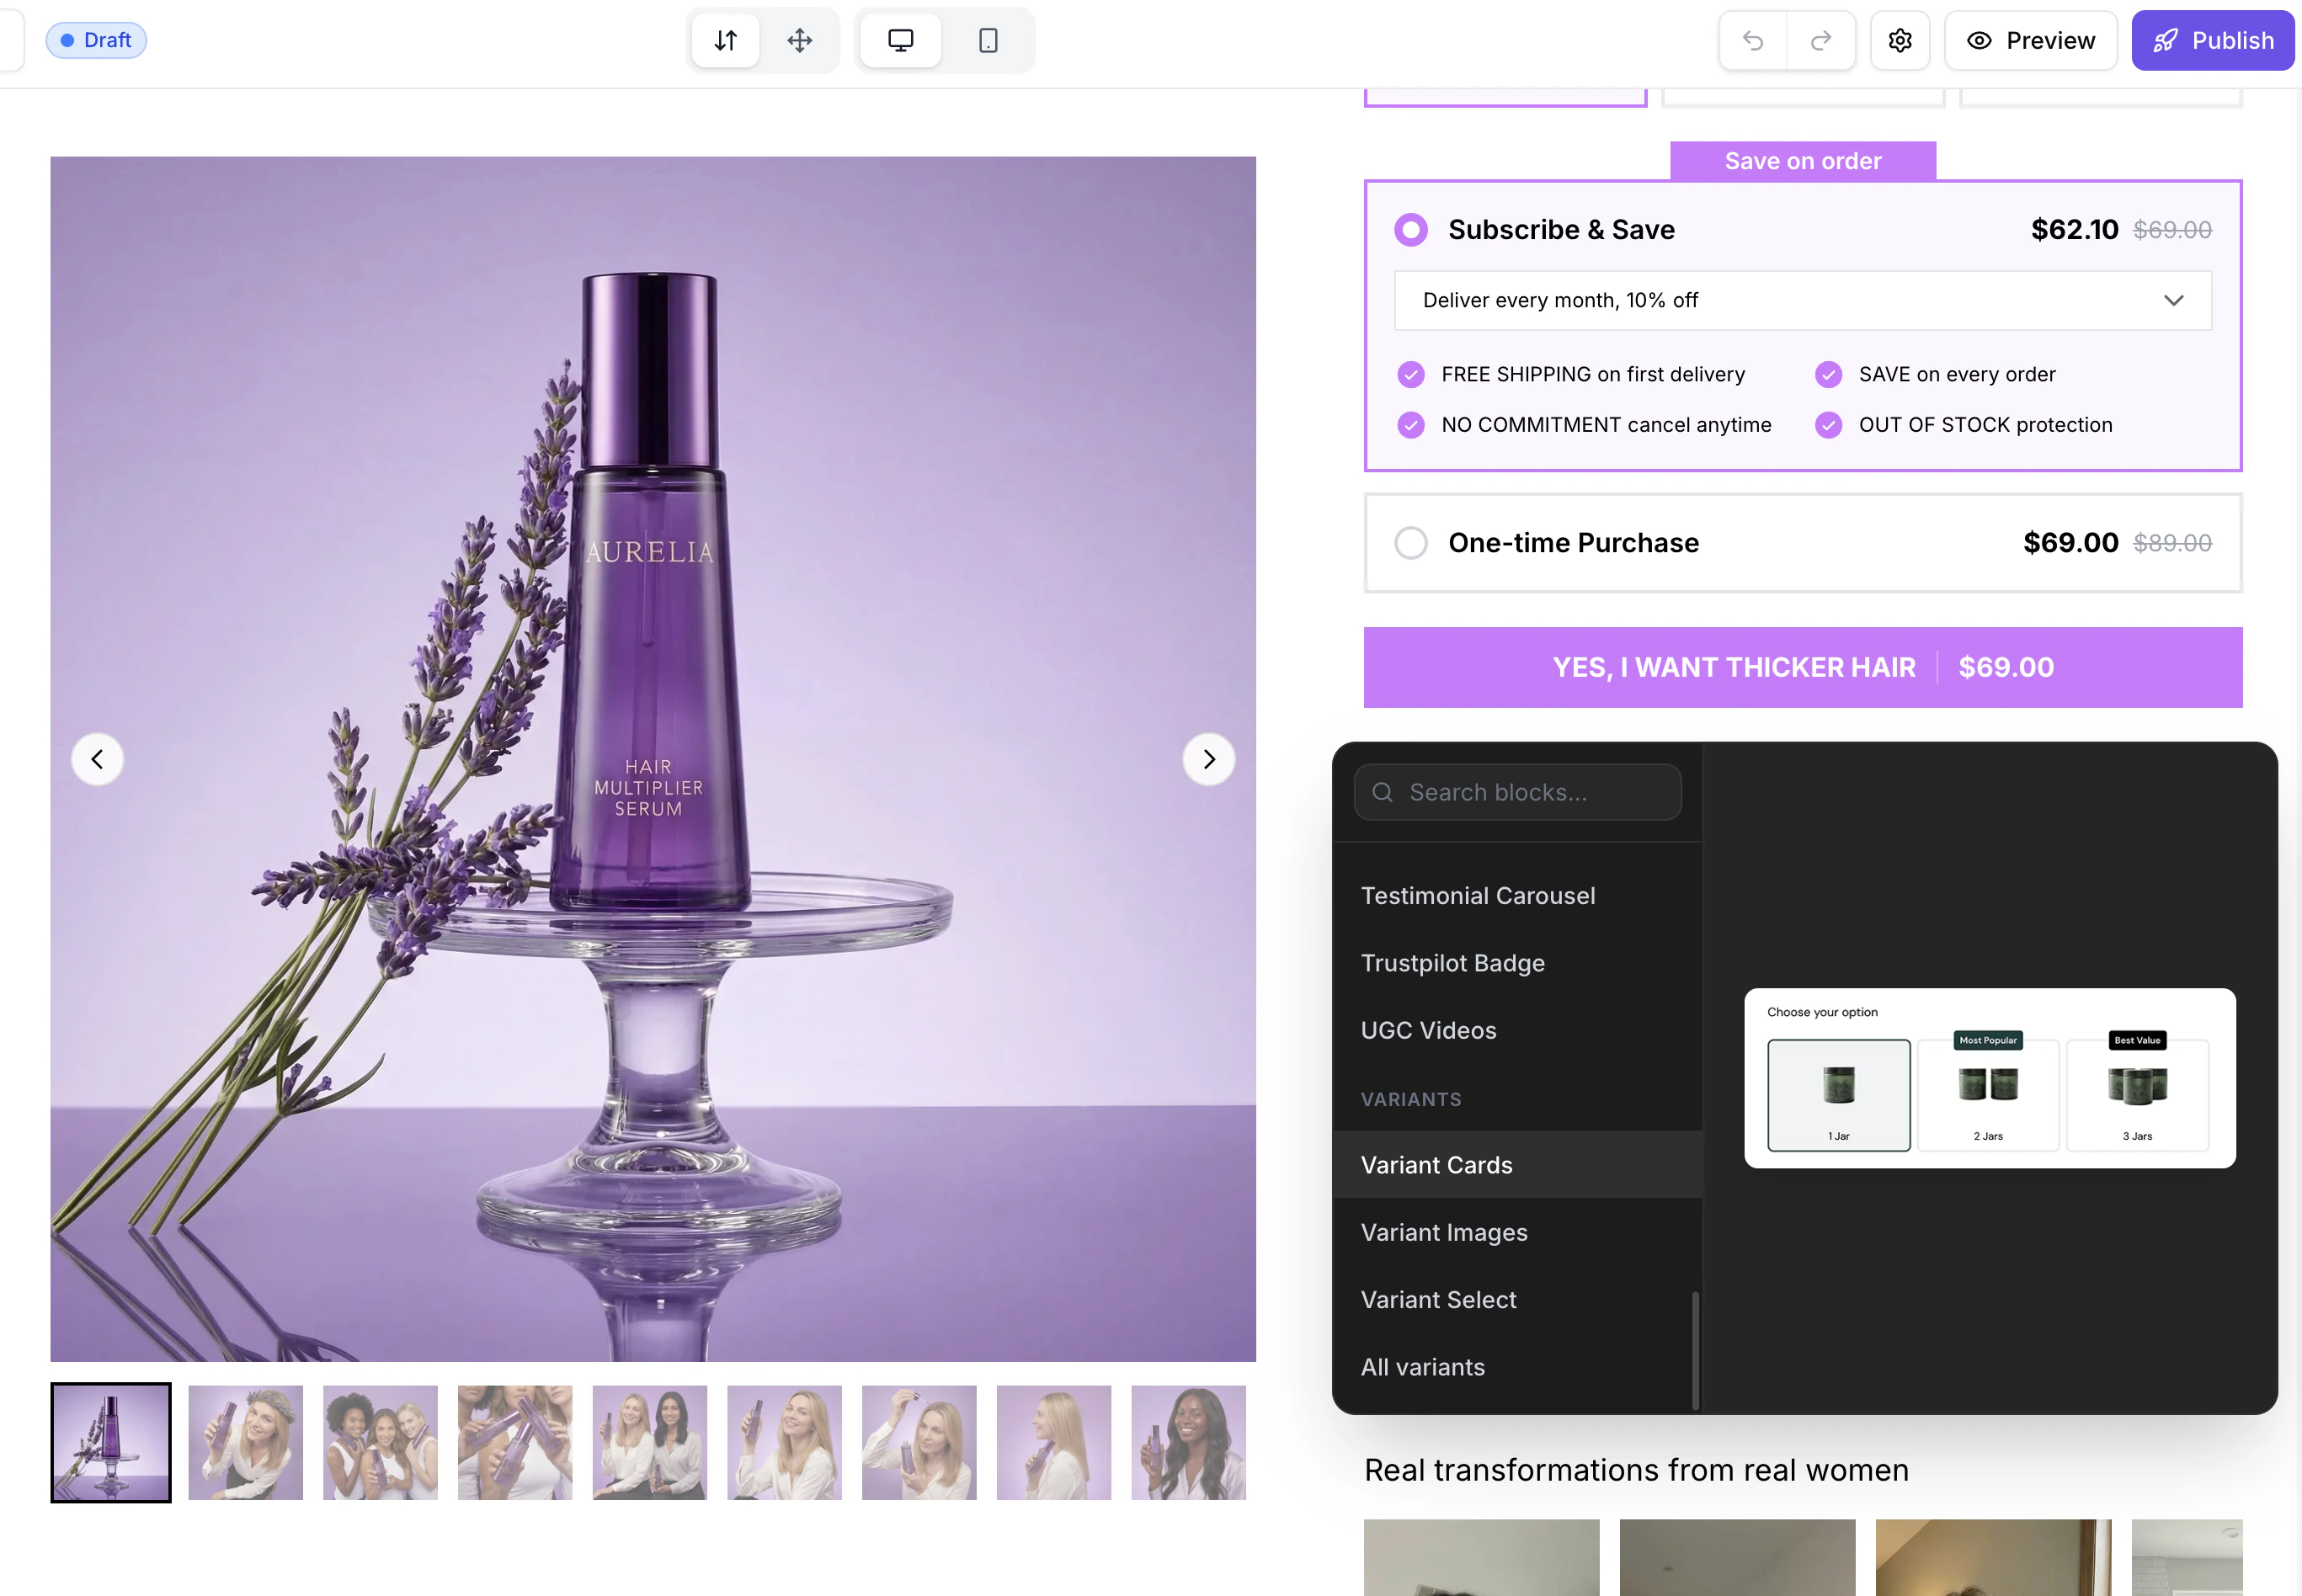
Click the Add Snippet button within the product section to browse and add individual snippets. Each snippet you add displays a different piece of product data or a custom element.
Linking a Shopify Product
Before a product section can display real data, you need to link it to a Shopify product:- Select the product section on the canvas.
- In the Section Settings panel (right sidebar), you will see a Product dropdown at the top.
- Click the dropdown and search for your product by name.
- Select the product. Data from Shopify (title, price, images, variants, etc.) is fetched and applied to all relevant snippets.
The product you link is the page product. It applies to all product sections on the page. When you publish to Shopify, the published page always shows the latest information from your Shopify store.
Available Product Snippets
EcomWize offers a wide range of product snippets that you can mix and match within a product section. Here is a complete list:Core Product Information
| Snippet | Description |
|---|---|
| Product Title | Displays the product name pulled from Shopify. Inherits heading typography from your brand style. |
| Product Price | Shows the current price, compare-at price (strikethrough for discounts), and sale badges. |
| Product Description | Renders the full product description from Shopify with HTML formatting preserved. |
| Product Images | Displays the product image gallery with thumbnails. Supports multiple images with a swipeable/clickable gallery. |
| Variant Images | Shows variant-specific images that change when a customer selects a different variant. |
Purchase Actions
| Snippet | Description |
|---|---|
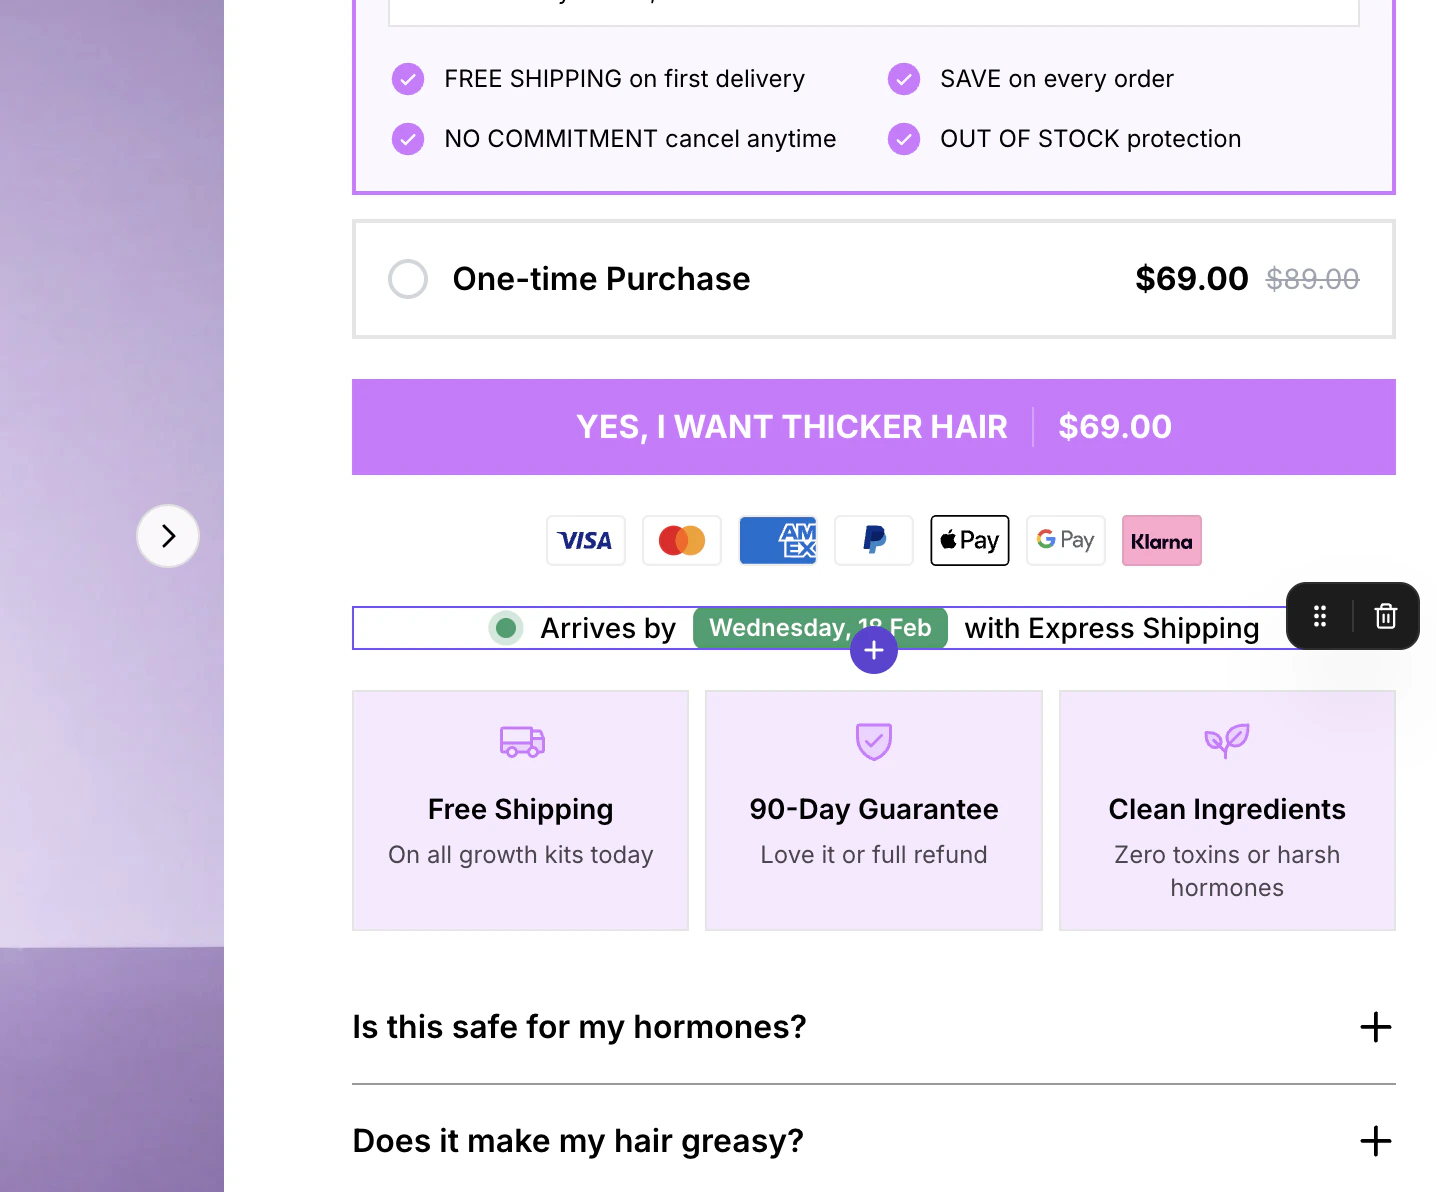
| Add to Cart | The primary purchase button. Connects to Shopify’s cart functionality. Displays “Add to Cart”, “Sold Out”, or custom text based on availability. |
| Variant Selectors | Dropdown or button-style selectors for product options like size, color, or material. |
| Variant Select | An alternative variant selector with a different visual style. |
| Variant Cards | Card-based variant selection with images and descriptions for each variant. |
| Selling Plans | Subscription/selling plan options (e.g., “Subscribe & Save 15%”). Displays plan frequencies and pricing pulled from Shopify selling plans. |
| Selling Plans with Gifts | Extended selling plan display that includes gift/bonus item information for subscription tiers. |
Trust and Social Proof
| Snippet | Description |
|---|---|
| Star Review | Displays a star rating (1-5 stars) with optional review count text. |
| App Star Rating | Integrates with review apps to display aggregated star ratings. |
| Trustpilot Badge | Displays a Trustpilot review badge with score and review count. |
| Testimonial Carousel | A mini carousel of customer testimonials embedded within the product section. |
| Testimonial Card | A single customer testimonial card with avatar, name, review text, and star rating. |
| UGC | User-generated content grid showing customer photos within the product section. |
Product Details
| Snippet | Description |
|---|---|
| Product Accordion (3 variants) | Expandable accordion panels for detailed product information like shipping, returns, ingredients, or sizing. Three visual styles available. |
| Bullet List | A styled list of product features or benefits with checkmarks or custom icons. |
| Icon Text | Icon + text pairs for highlighting key product features (e.g., “Free Shipping”, “30-Day Returns”). |
| Product Text | A customizable text block for additional product information or marketing copy. |
Status and Availability
| Snippet | Description |
|---|---|
| Stock Status | Displays current stock level with urgency messaging (e.g., “Only 3 left in stock!”). |
| Low Stock | A dedicated low-stock indicator that shows when inventory is running low. |
| Delivery Date | Estimated delivery date calculator that shows expected arrival based on current date. |
Visual Elements
| Snippet | Description |
|---|---|
| Payment Icons | Displays accepted payment method icons (Visa, Mastercard, PayPal, Apple Pay, etc.). |
| Product Tag | A styled label/tag element for badges like “Best Seller”, “New”, or “Limited Edition”. |
| Notice Box | An attention-grabbing notice box for important product information, warnings, or promotions. |
| Product Box | A highlighted content box for featured information. |
| Two Box | Side-by-side content boxes for comparing features or displaying paired information. |
| Three Box | Three-column content boxes for feature breakdowns. |
| Kaching Bundles | Integration with the Kaching Bundles app for displaying product bundle deals. |
Adding Snippets to a Product Section
Click Add Snippet
Look for the Add Snippet button within the product section. It typically appears at the bottom of the existing snippets.
How Shopify Data Syncs
Product sections use dynamic data from your Shopify store. Here is how the syncing works:- In the builder: When you link a product, EcomWize fetches the product data from Shopify and displays it in the preview. This is a snapshot of the data at the time you linked the product.
- On the published page: The published page always shows the current data from your Shopify store — if you change a price or description in Shopify, the landing page updates automatically.
Product Section vs. Static Sections
| Product Sections | Static Sections | |
|---|---|---|
| Data source | Live Shopify product data | Manually entered content |
| Updates automatically | Yes, syncs with Shopify | No, requires manual editing |
| Variants and pricing | Dynamic from Shopify | N/A |
| Add to Cart | Functional, connected to Shopify cart | N/A |
| Content editing | Limited to Shopify product fields | Fully customizable text |
Template Types and Product Data
When publishing your page to Shopify, the template type affects how product data is loaded:- Page template: Product data is fetched by product handle. Best for standalone landing pages.
- Product template: Product data comes from the current product context. Best when the landing page replaces or extends the default product page.