> ## Documentation Index
> Fetch the complete documentation index at: https://docs.ecomwize.io/llms.txt
> Use this file to discover all available pages before exploring further.
# Connecting Your Shopify Store
> Step-by-step guide to connecting your Shopify store to EcomWize Builder.
To publish landing pages to your Shopify store, you need to connect it to EcomWize Builder. The connection process walks you through creating a custom app on Shopify and linking it to your EcomWize account.
## Prerequisites
Before you begin, make sure you have:
* A Shopify store (any plan)
* An EcomWize Builder account
## Connecting Your Store
The connection process uses 5 simple steps with video tutorials for each step.
Go to the **Stores** page from your EcomWize dashboard. Click the **Connect Store** button.
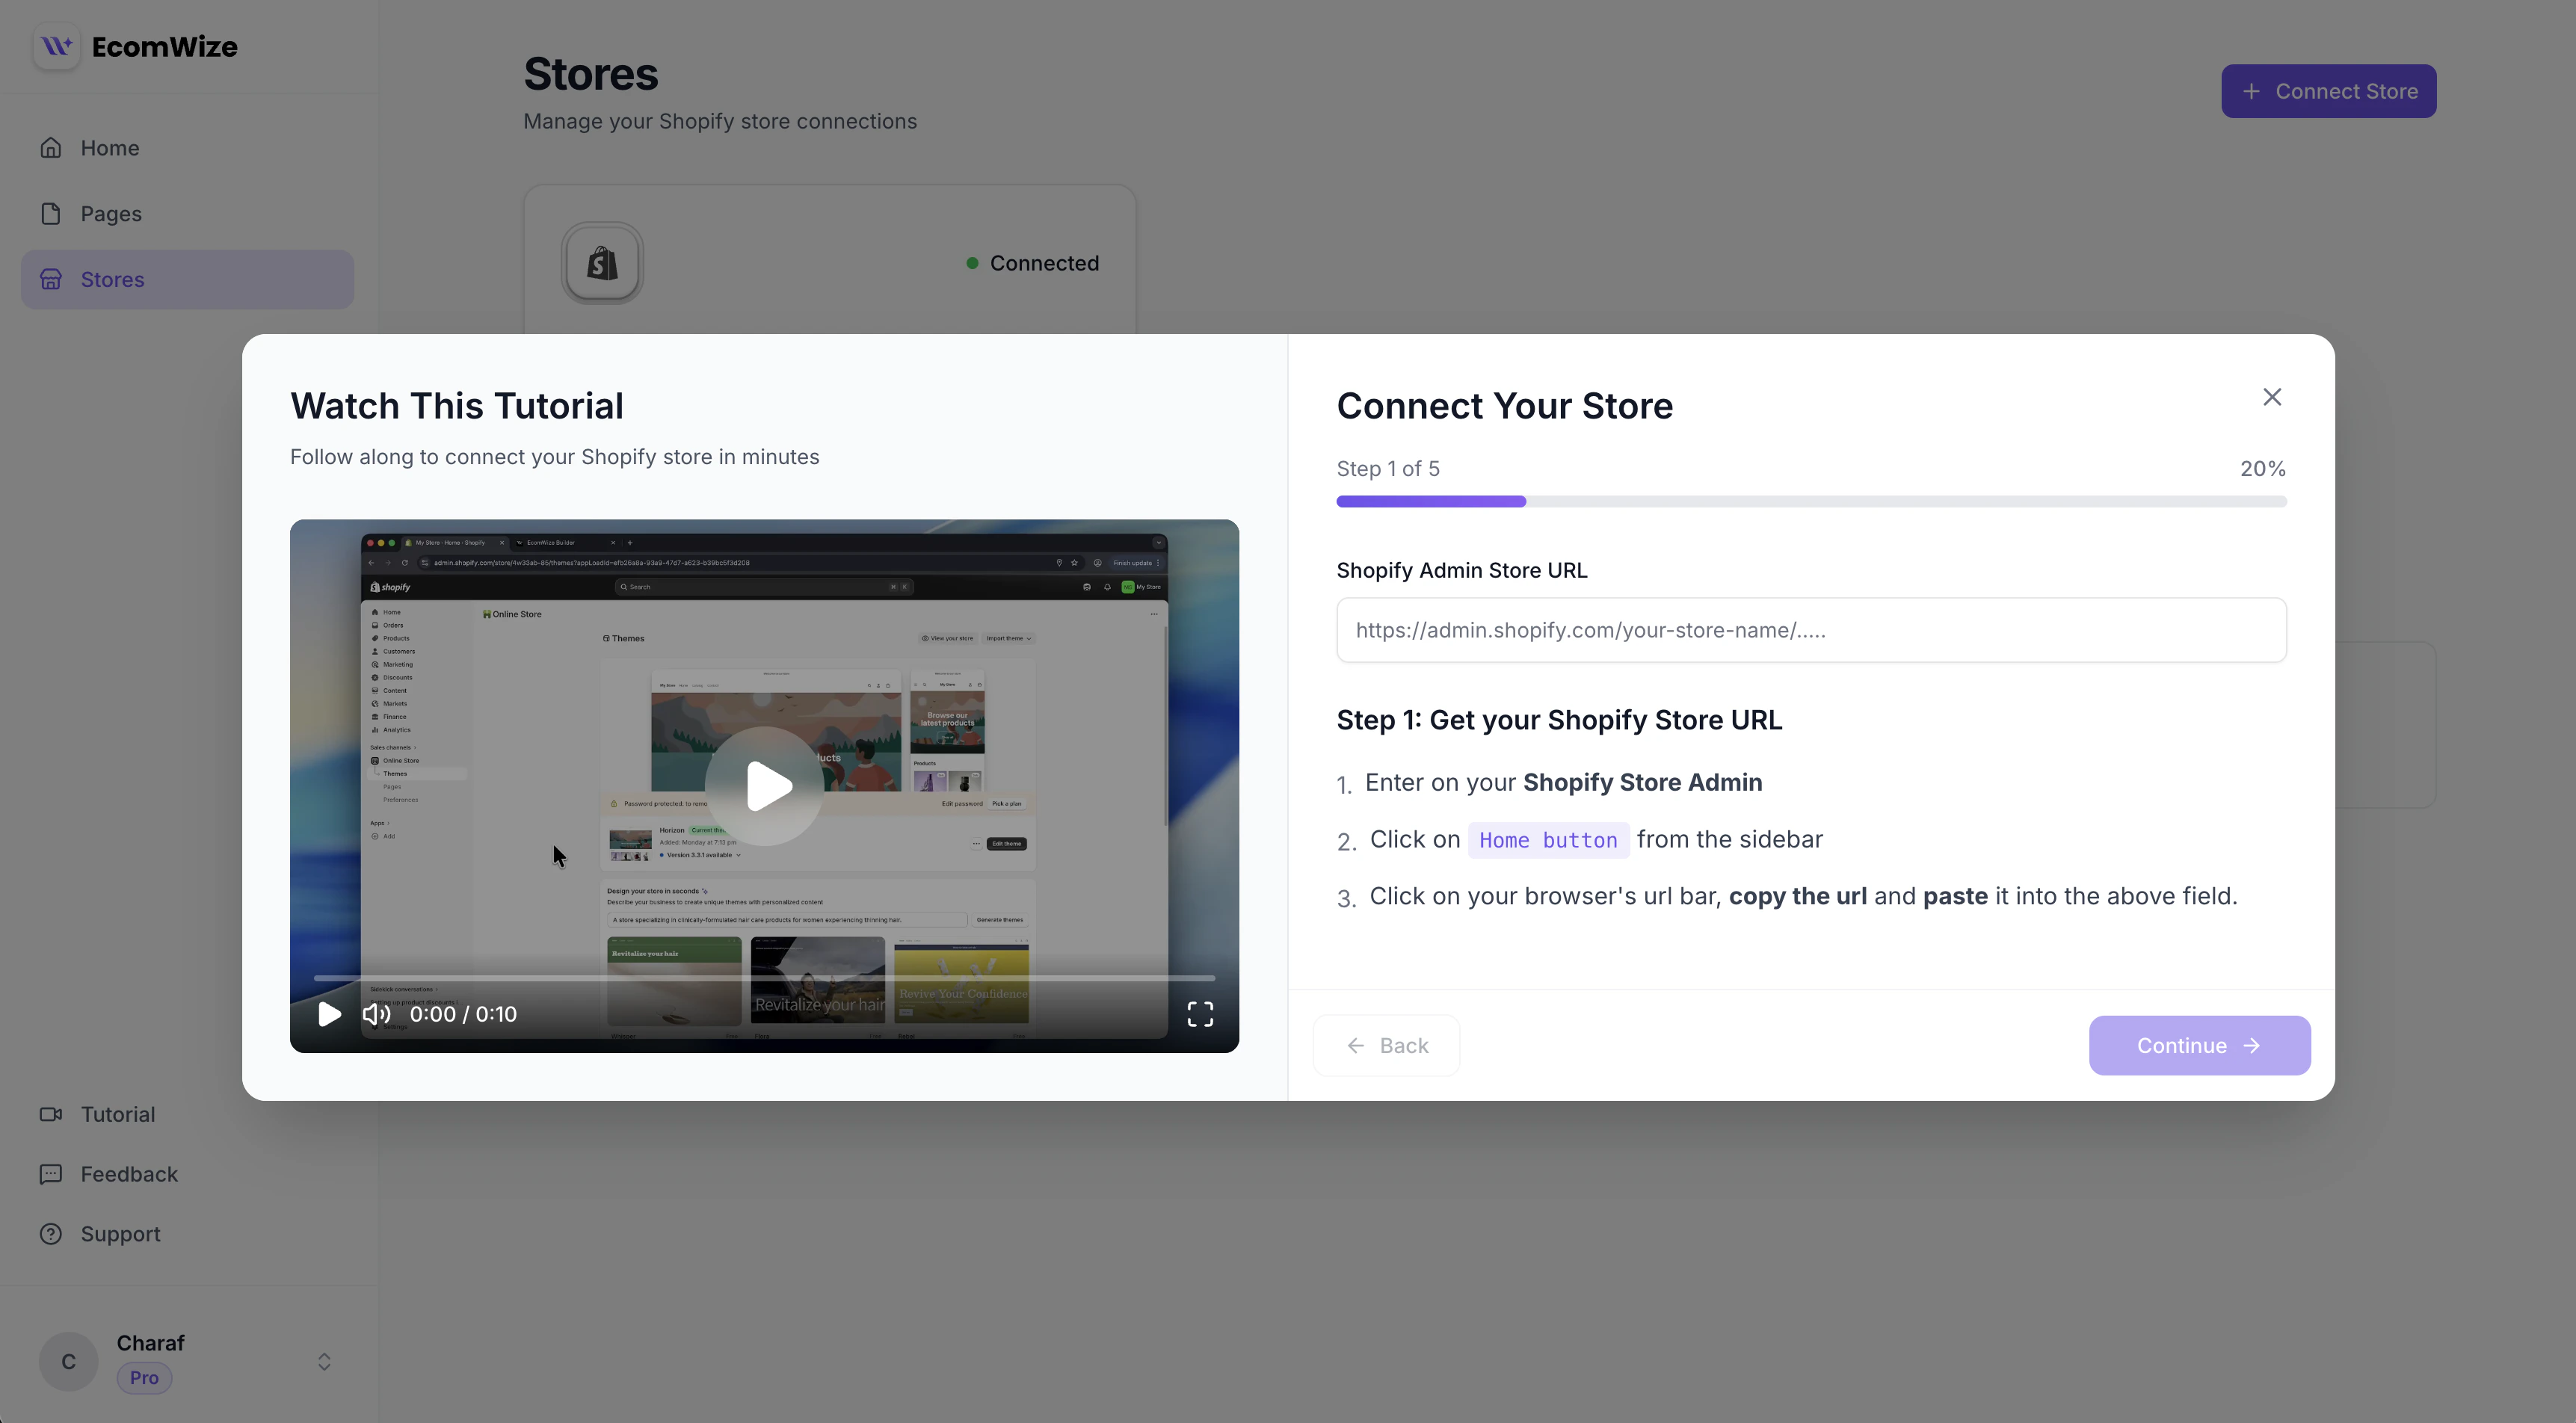 Enter your Shopify admin store URL. You can paste it in either format:
* `https://admin.shopify.com/store/your-store-name`
* `your-store.myshopify.com`
To find this URL:
1. Go to your **Shopify Store Admin**
2. Click on the **Home button** from the sidebar
3. Click on your browser's URL bar, **copy the URL**, and paste it into the field
EcomWize will automatically extract your shop domain from either format.
Open the **Shopify Dev Dashboard** by visiting [dev.shopify.com/dashboard](https://dev.shopify.com/dashboard) and click the **Create app** button.
Inside the opened modal/popup:
1. In the **name** field, enter: `EcomWize`
2. Click the **Create** button
3. In the **App URL** field, enter: `https://app.ecomwize.io/`
4. Uncheck the **Embed app in Shopify admin** checkbox
In the opened page:
1. Find the **Access** card
2. Check the **Use legacy install flow** checkbox
3. Complete the **Redirect URLs** field with the value shown in EcomWize (copy it using the copy button)
Make sure you check the **Use legacy install flow** checkbox and complete the **Redirect URLs** field. Otherwise you will not be able to connect your store.
4. Click the **Release** button located at the bottom right corner
5. In the opened modal/popup, leave the fields empty and click **Release**
1. From the **left sidebar**, click on **Settings** -- you will see the **Client ID** and **Secret** fields at the top of the page
2. Copy and paste both values into the corresponding fields in EcomWize
3. Click **Connect Store** to complete the connection
You will be redirected to Shopify to authorize the app. After approving the permissions, you will be redirected back to EcomWize with your store connected.
Enter your Shopify admin store URL. You can paste it in either format:
* `https://admin.shopify.com/store/your-store-name`
* `your-store.myshopify.com`
To find this URL:
1. Go to your **Shopify Store Admin**
2. Click on the **Home button** from the sidebar
3. Click on your browser's URL bar, **copy the URL**, and paste it into the field
EcomWize will automatically extract your shop domain from either format.
Open the **Shopify Dev Dashboard** by visiting [dev.shopify.com/dashboard](https://dev.shopify.com/dashboard) and click the **Create app** button.
Inside the opened modal/popup:
1. In the **name** field, enter: `EcomWize`
2. Click the **Create** button
3. In the **App URL** field, enter: `https://app.ecomwize.io/`
4. Uncheck the **Embed app in Shopify admin** checkbox
In the opened page:
1. Find the **Access** card
2. Check the **Use legacy install flow** checkbox
3. Complete the **Redirect URLs** field with the value shown in EcomWize (copy it using the copy button)
Make sure you check the **Use legacy install flow** checkbox and complete the **Redirect URLs** field. Otherwise you will not be able to connect your store.
4. Click the **Release** button located at the bottom right corner
5. In the opened modal/popup, leave the fields empty and click **Release**
1. From the **left sidebar**, click on **Settings** -- you will see the **Client ID** and **Secret** fields at the top of the page
2. Copy and paste both values into the corresponding fields in EcomWize
3. Click **Connect Store** to complete the connection
You will be redirected to Shopify to authorize the app. After approving the permissions, you will be redirected back to EcomWize with your store connected.
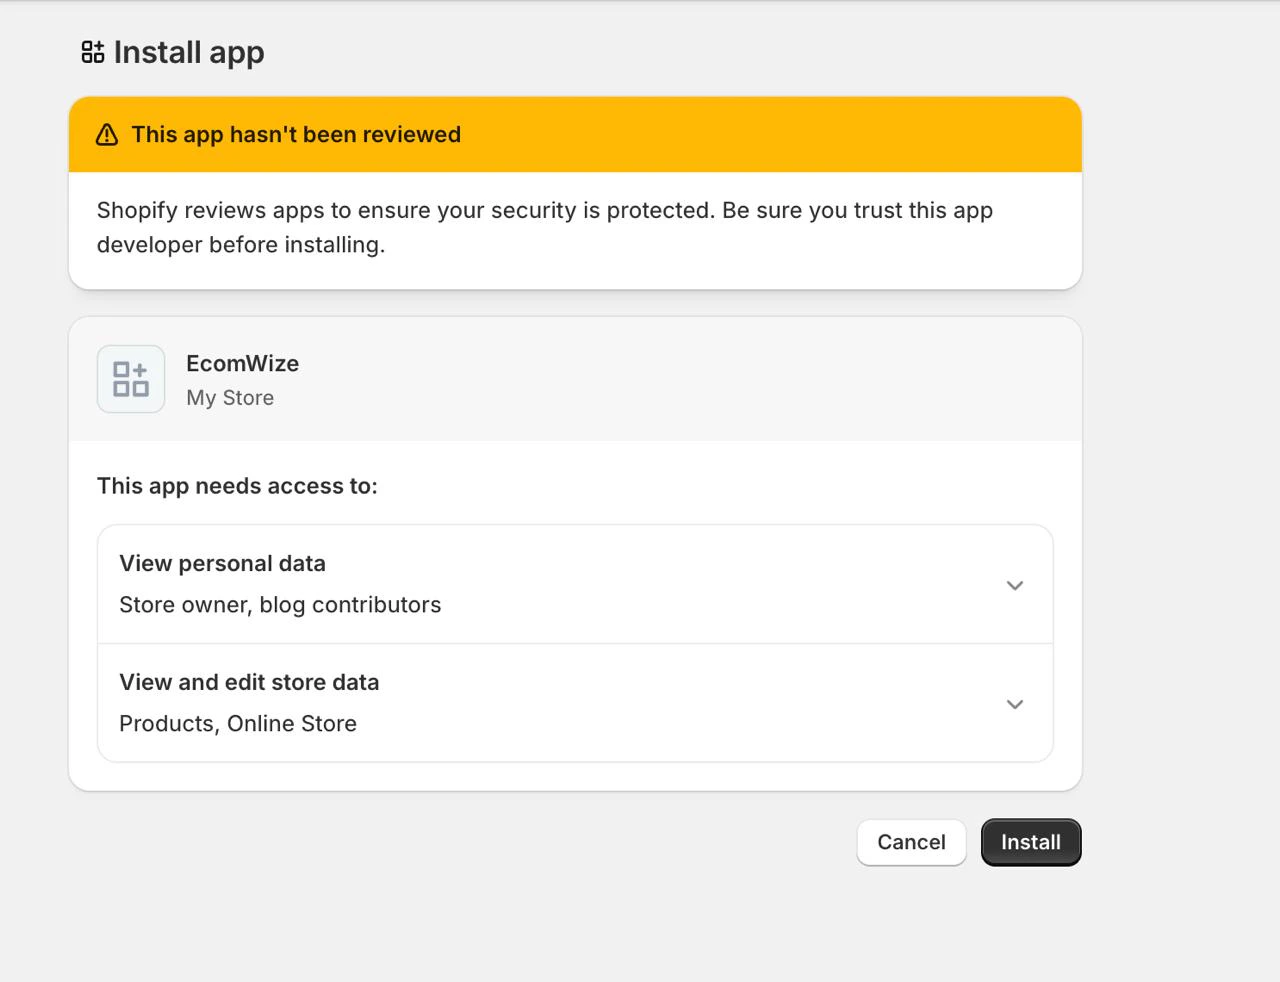 Each step includes a video walkthrough. If you are unsure about any step, watch the video before proceeding.
## Managing Multiple Stores
EcomWize supports connecting multiple Shopify stores depending on your plan:
| Plan | Maximum Stores |
| ----------- | ---------------- |
| **Free** | 1 store |
| **Starter** | 1 store |
| **Pro** | Unlimited stores |
## Verifying the Connection
After connecting, your store should appear on the Stores page with a connected status.
Each step includes a video walkthrough. If you are unsure about any step, watch the video before proceeding.
## Managing Multiple Stores
EcomWize supports connecting multiple Shopify stores depending on your plan:
| Plan | Maximum Stores |
| ----------- | ---------------- |
| **Free** | 1 store |
| **Starter** | 1 store |
| **Pro** | Unlimited stores |
## Verifying the Connection
After connecting, your store should appear on the Stores page with a connected status.
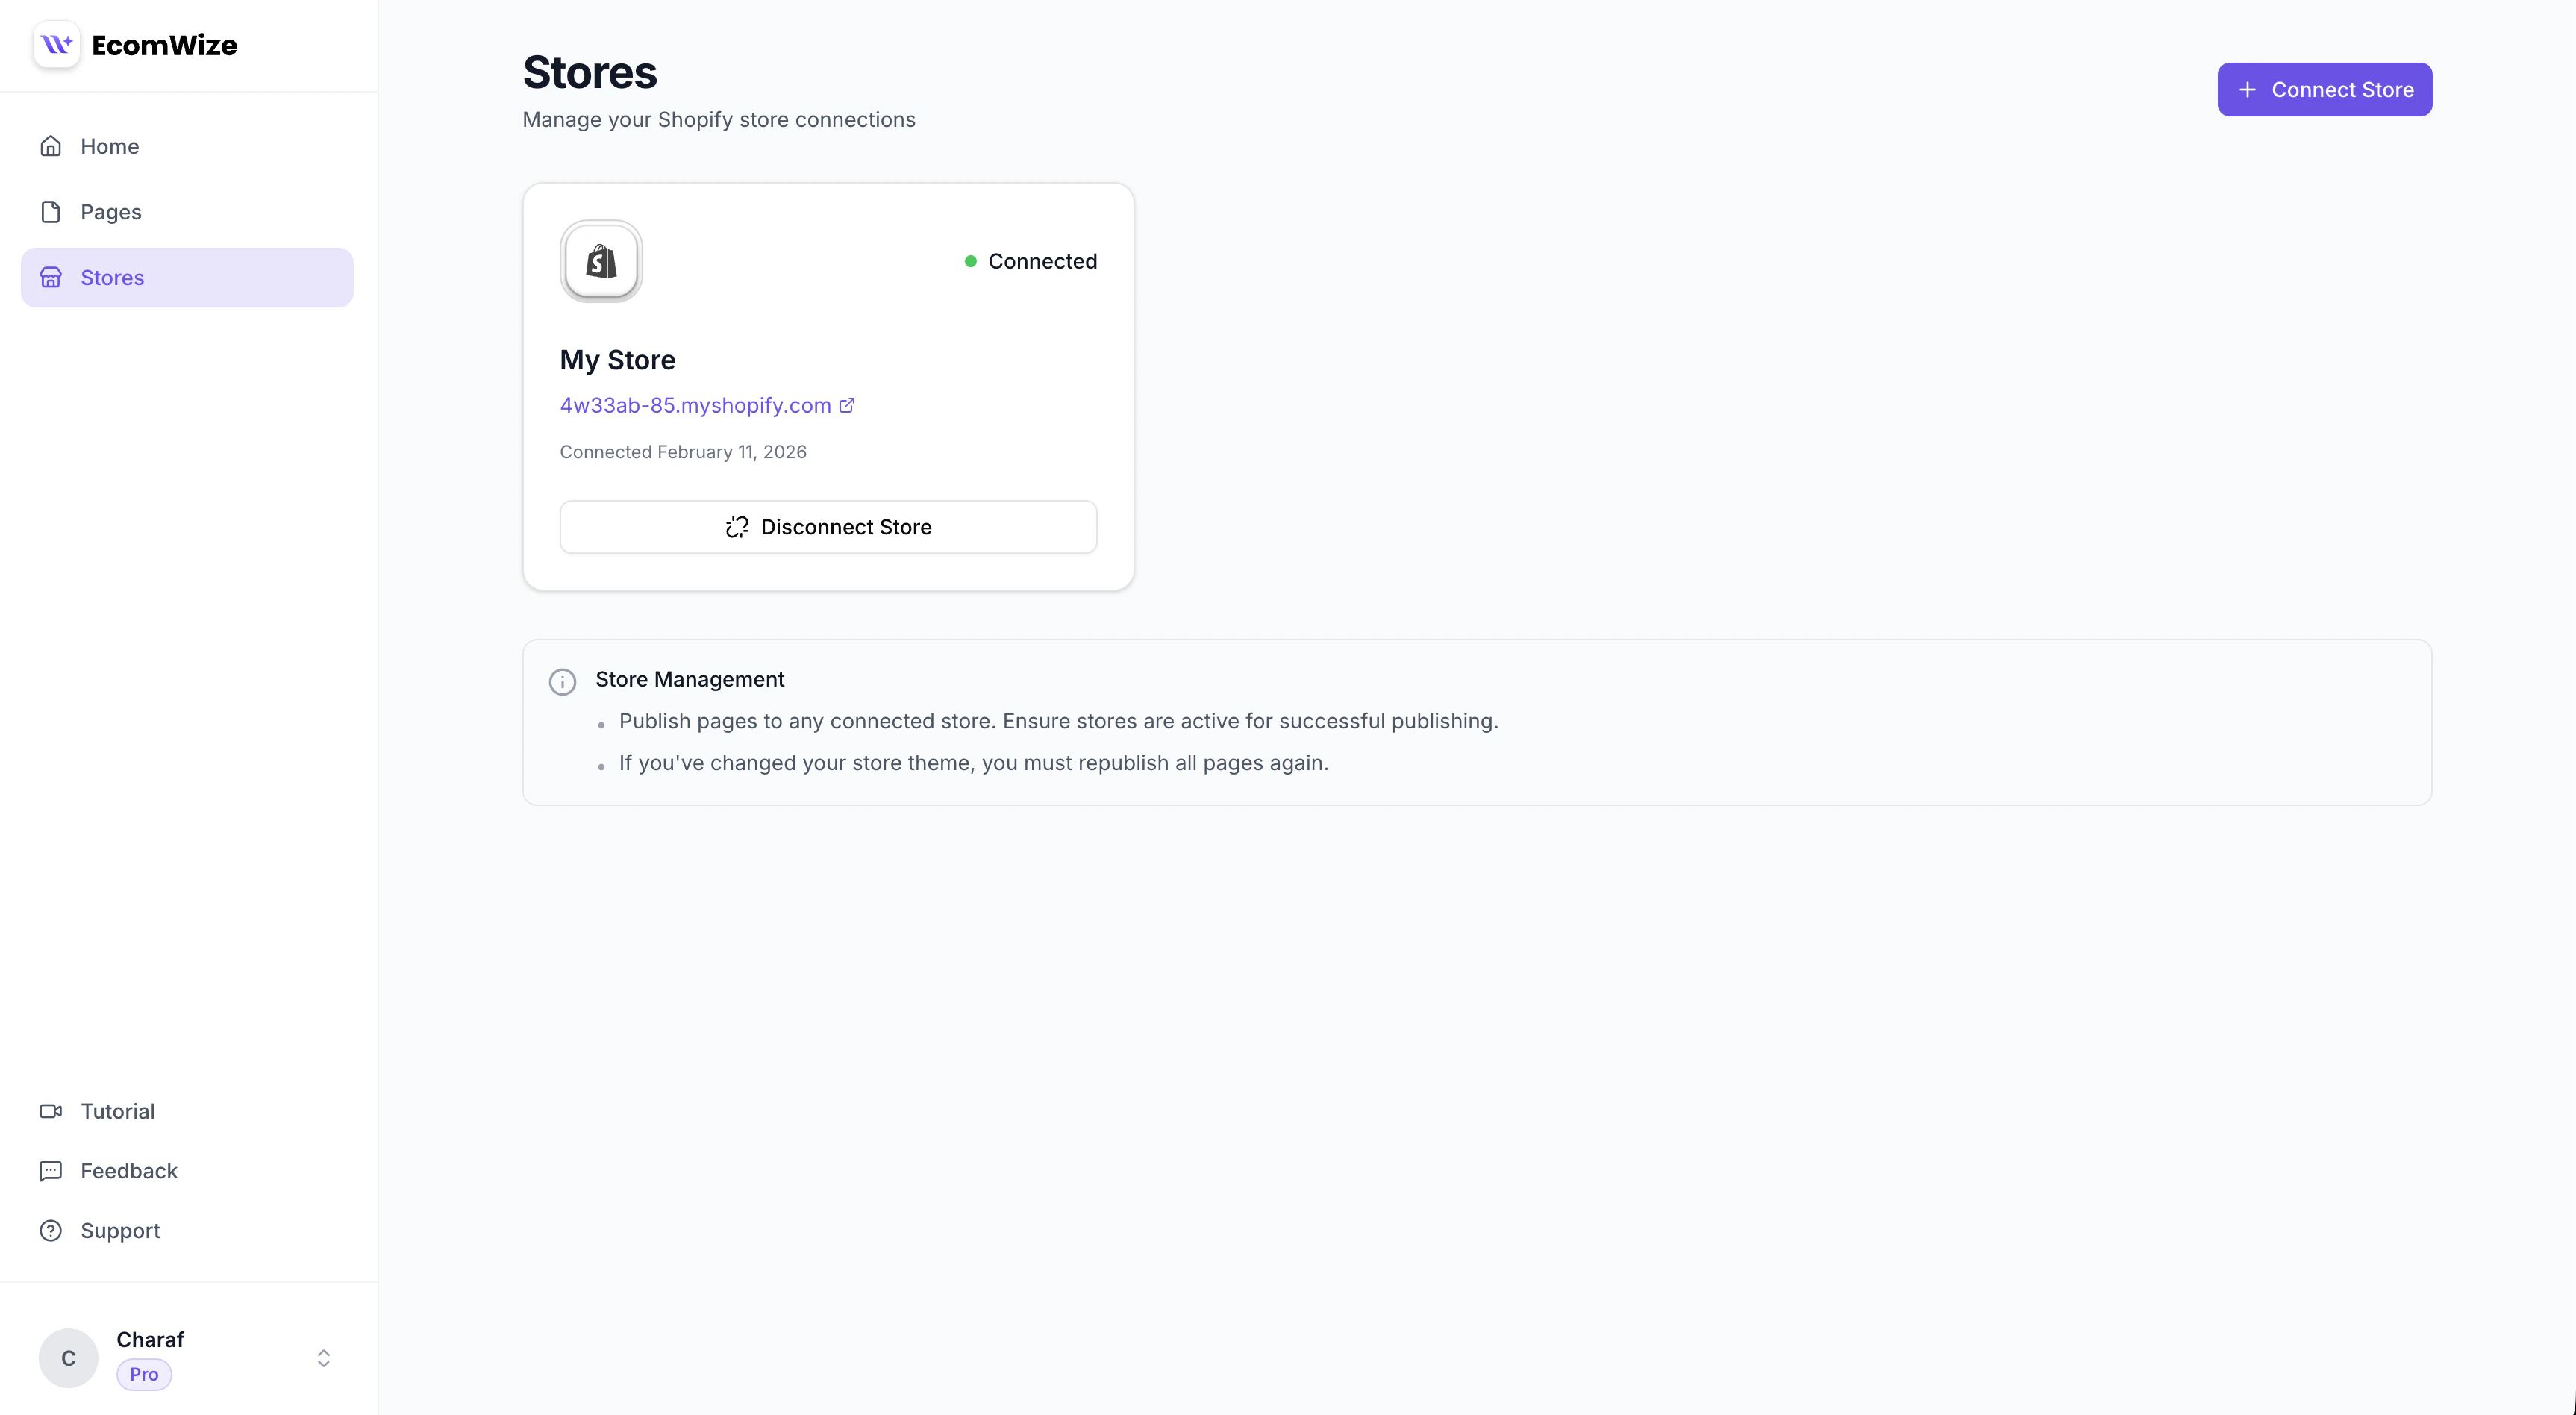 You can verify the connection is working by:
1. Opening any page in the builder
2. Going to Page Settings
3. Checking that your store appears in the Store dropdown
4. Trying to search for products (if your store has products)
## Disconnecting a Store
To disconnect a store:
1. Go to the Stores page
2. Find the store you want to disconnect
3. Click the disconnect or remove option
4. Confirm the disconnection
Disconnecting a store does not unpublish any pages you have already published to that store. Published pages will remain live on Shopify until you manually remove them from Shopify's theme editor or unpublish them before disconnecting.
## Troubleshooting
This can happen if:
* You took too long to authorize (the session expired)
* You opened the authorization link in a different browser or tab
* Solution: Close and start the connection process again from the beginning
Possible causes:
* The Client ID or Secret is incorrect
* The custom app has been deleted or its credentials have been rotated
* Solution: Verify your credentials, ensure the app exists in Shopify, and try again
Make sure your store URL is in one of these formats:
* `your-store.myshopify.com`
* `https://admin.shopify.com/store/your-store`
Custom domains (e.g., `www.yourbrand.com`) are not supported for the connection. Use your `.myshopify.com` URL instead.
If you encounter any other issues during the connection process, contact us at **[support@ecomwize.io](mailto:support@ecomwize.io)** and we will help you get connected.
You can verify the connection is working by:
1. Opening any page in the builder
2. Going to Page Settings
3. Checking that your store appears in the Store dropdown
4. Trying to search for products (if your store has products)
## Disconnecting a Store
To disconnect a store:
1. Go to the Stores page
2. Find the store you want to disconnect
3. Click the disconnect or remove option
4. Confirm the disconnection
Disconnecting a store does not unpublish any pages you have already published to that store. Published pages will remain live on Shopify until you manually remove them from Shopify's theme editor or unpublish them before disconnecting.
## Troubleshooting
This can happen if:
* You took too long to authorize (the session expired)
* You opened the authorization link in a different browser or tab
* Solution: Close and start the connection process again from the beginning
Possible causes:
* The Client ID or Secret is incorrect
* The custom app has been deleted or its credentials have been rotated
* Solution: Verify your credentials, ensure the app exists in Shopify, and try again
Make sure your store URL is in one of these formats:
* `your-store.myshopify.com`
* `https://admin.shopify.com/store/your-store`
Custom domains (e.g., `www.yourbrand.com`) are not supported for the connection. Use your `.myshopify.com` URL instead.
If you encounter any other issues during the connection process, contact us at **[support@ecomwize.io](mailto:support@ecomwize.io)** and we will help you get connected.