> ## Documentation Index
> Fetch the complete documentation index at: https://docs.ecomwize.io/llms.txt
> Use this file to discover all available pages before exploring further.
# Media Library
> Browse, manage, and use your uploaded media files across all your landing pages.
The Media Library is your central hub for all uploaded images and videos. It provides a visual interface for browsing, searching, previewing, and managing your media assets.
 ## Accessing the Media Library
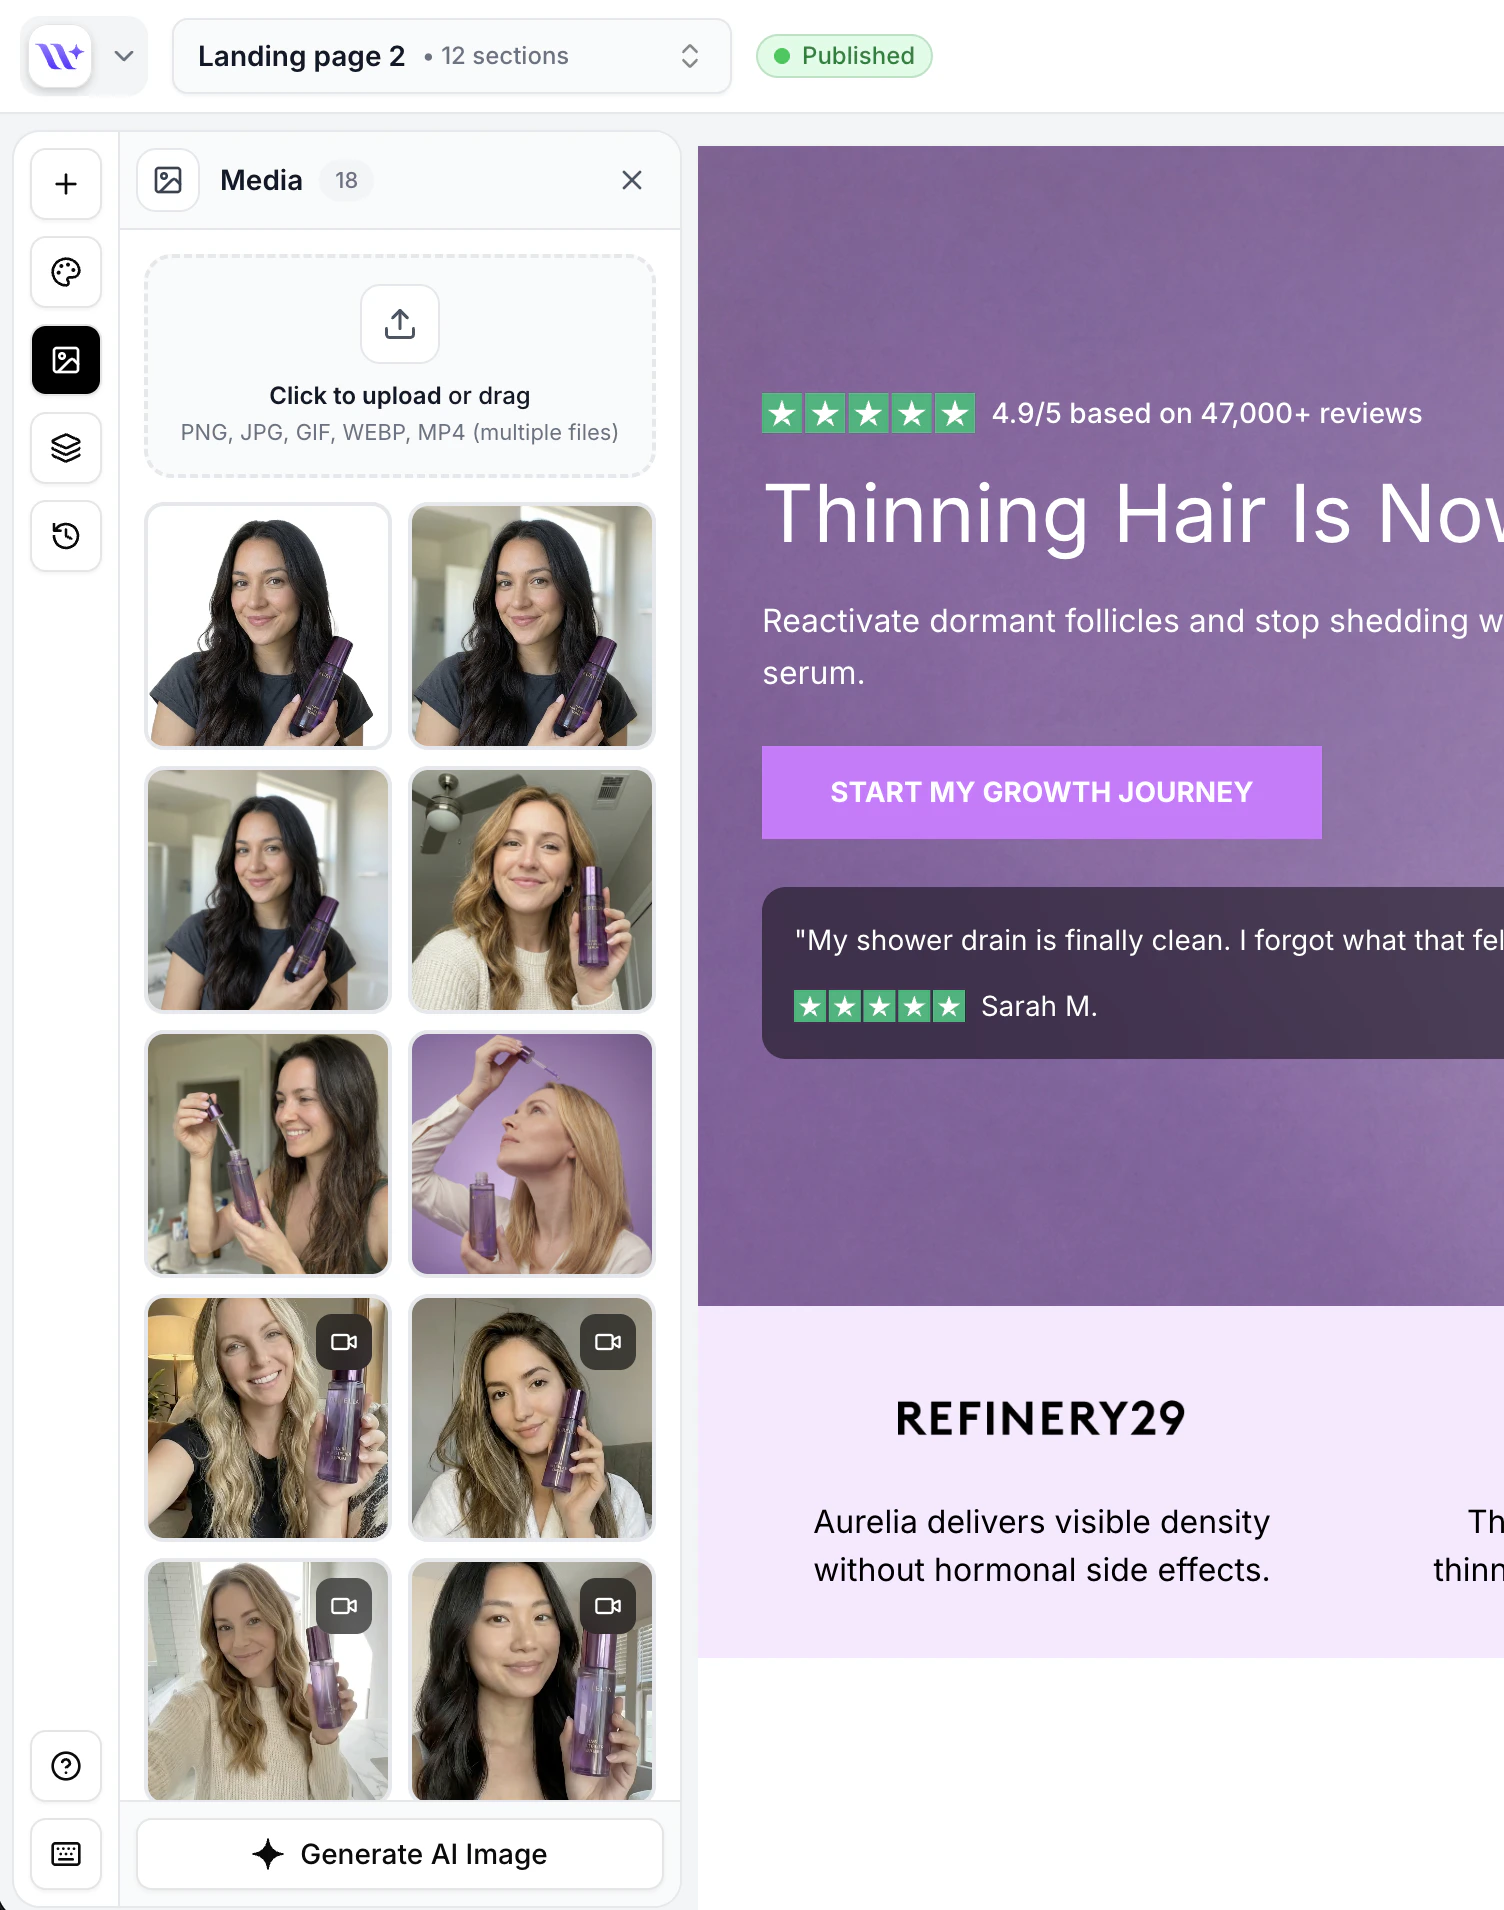
Open the Media Library by clicking the media icon in the builder toolbar. The Media Panel opens as a side panel displaying all your uploaded files as thumbnails.
## Browsing Media
Your uploaded files are displayed as a grid of thumbnails, sorted by upload date with the most recent files first. Each thumbnail shows:
* A preview of the image or a video thumbnail
* The file name
Images and videos are displayed together in the same grid. Video files are distinguished by a video icon overlay on the thumbnail.
## Searching and Filtering
Use the search functionality at the top of the Media Panel to find specific files by name. This is especially useful when you have a large library of uploaded assets.
Give your files descriptive names before uploading. Instead of "IMG\_4523.jpg," rename it to "hero-product-green-bottle.jpg" so you can find it easily later.
## Previewing Media
To preview a file at full size before using it:
1. Hover over any thumbnail in the media library
2. Click the preview/eye icon that appears
3. A full-size preview opens in a modal overlay
4. Close the preview to return to the library
Video previews play the video in the preview modal with playback controls.
## Accessing the Media Library
Open the Media Library by clicking the media icon in the builder toolbar. The Media Panel opens as a side panel displaying all your uploaded files as thumbnails.
## Browsing Media
Your uploaded files are displayed as a grid of thumbnails, sorted by upload date with the most recent files first. Each thumbnail shows:
* A preview of the image or a video thumbnail
* The file name
Images and videos are displayed together in the same grid. Video files are distinguished by a video icon overlay on the thumbnail.
## Searching and Filtering
Use the search functionality at the top of the Media Panel to find specific files by name. This is especially useful when you have a large library of uploaded assets.
Give your files descriptive names before uploading. Instead of "IMG\_4523.jpg," rename it to "hero-product-green-bottle.jpg" so you can find it easily later.
## Previewing Media
To preview a file at full size before using it:
1. Hover over any thumbnail in the media library
2. Click the preview/eye icon that appears
3. A full-size preview opens in a modal overlay
4. Close the preview to return to the library
Video previews play the video in the preview modal with playback controls.
 ## Using Media in Sections
There are two ways to use media from your library in sections:
### Select from Library
Click on any image element in the canvas to select it.
The Media Panel opens (or click the media icon to open it manually).
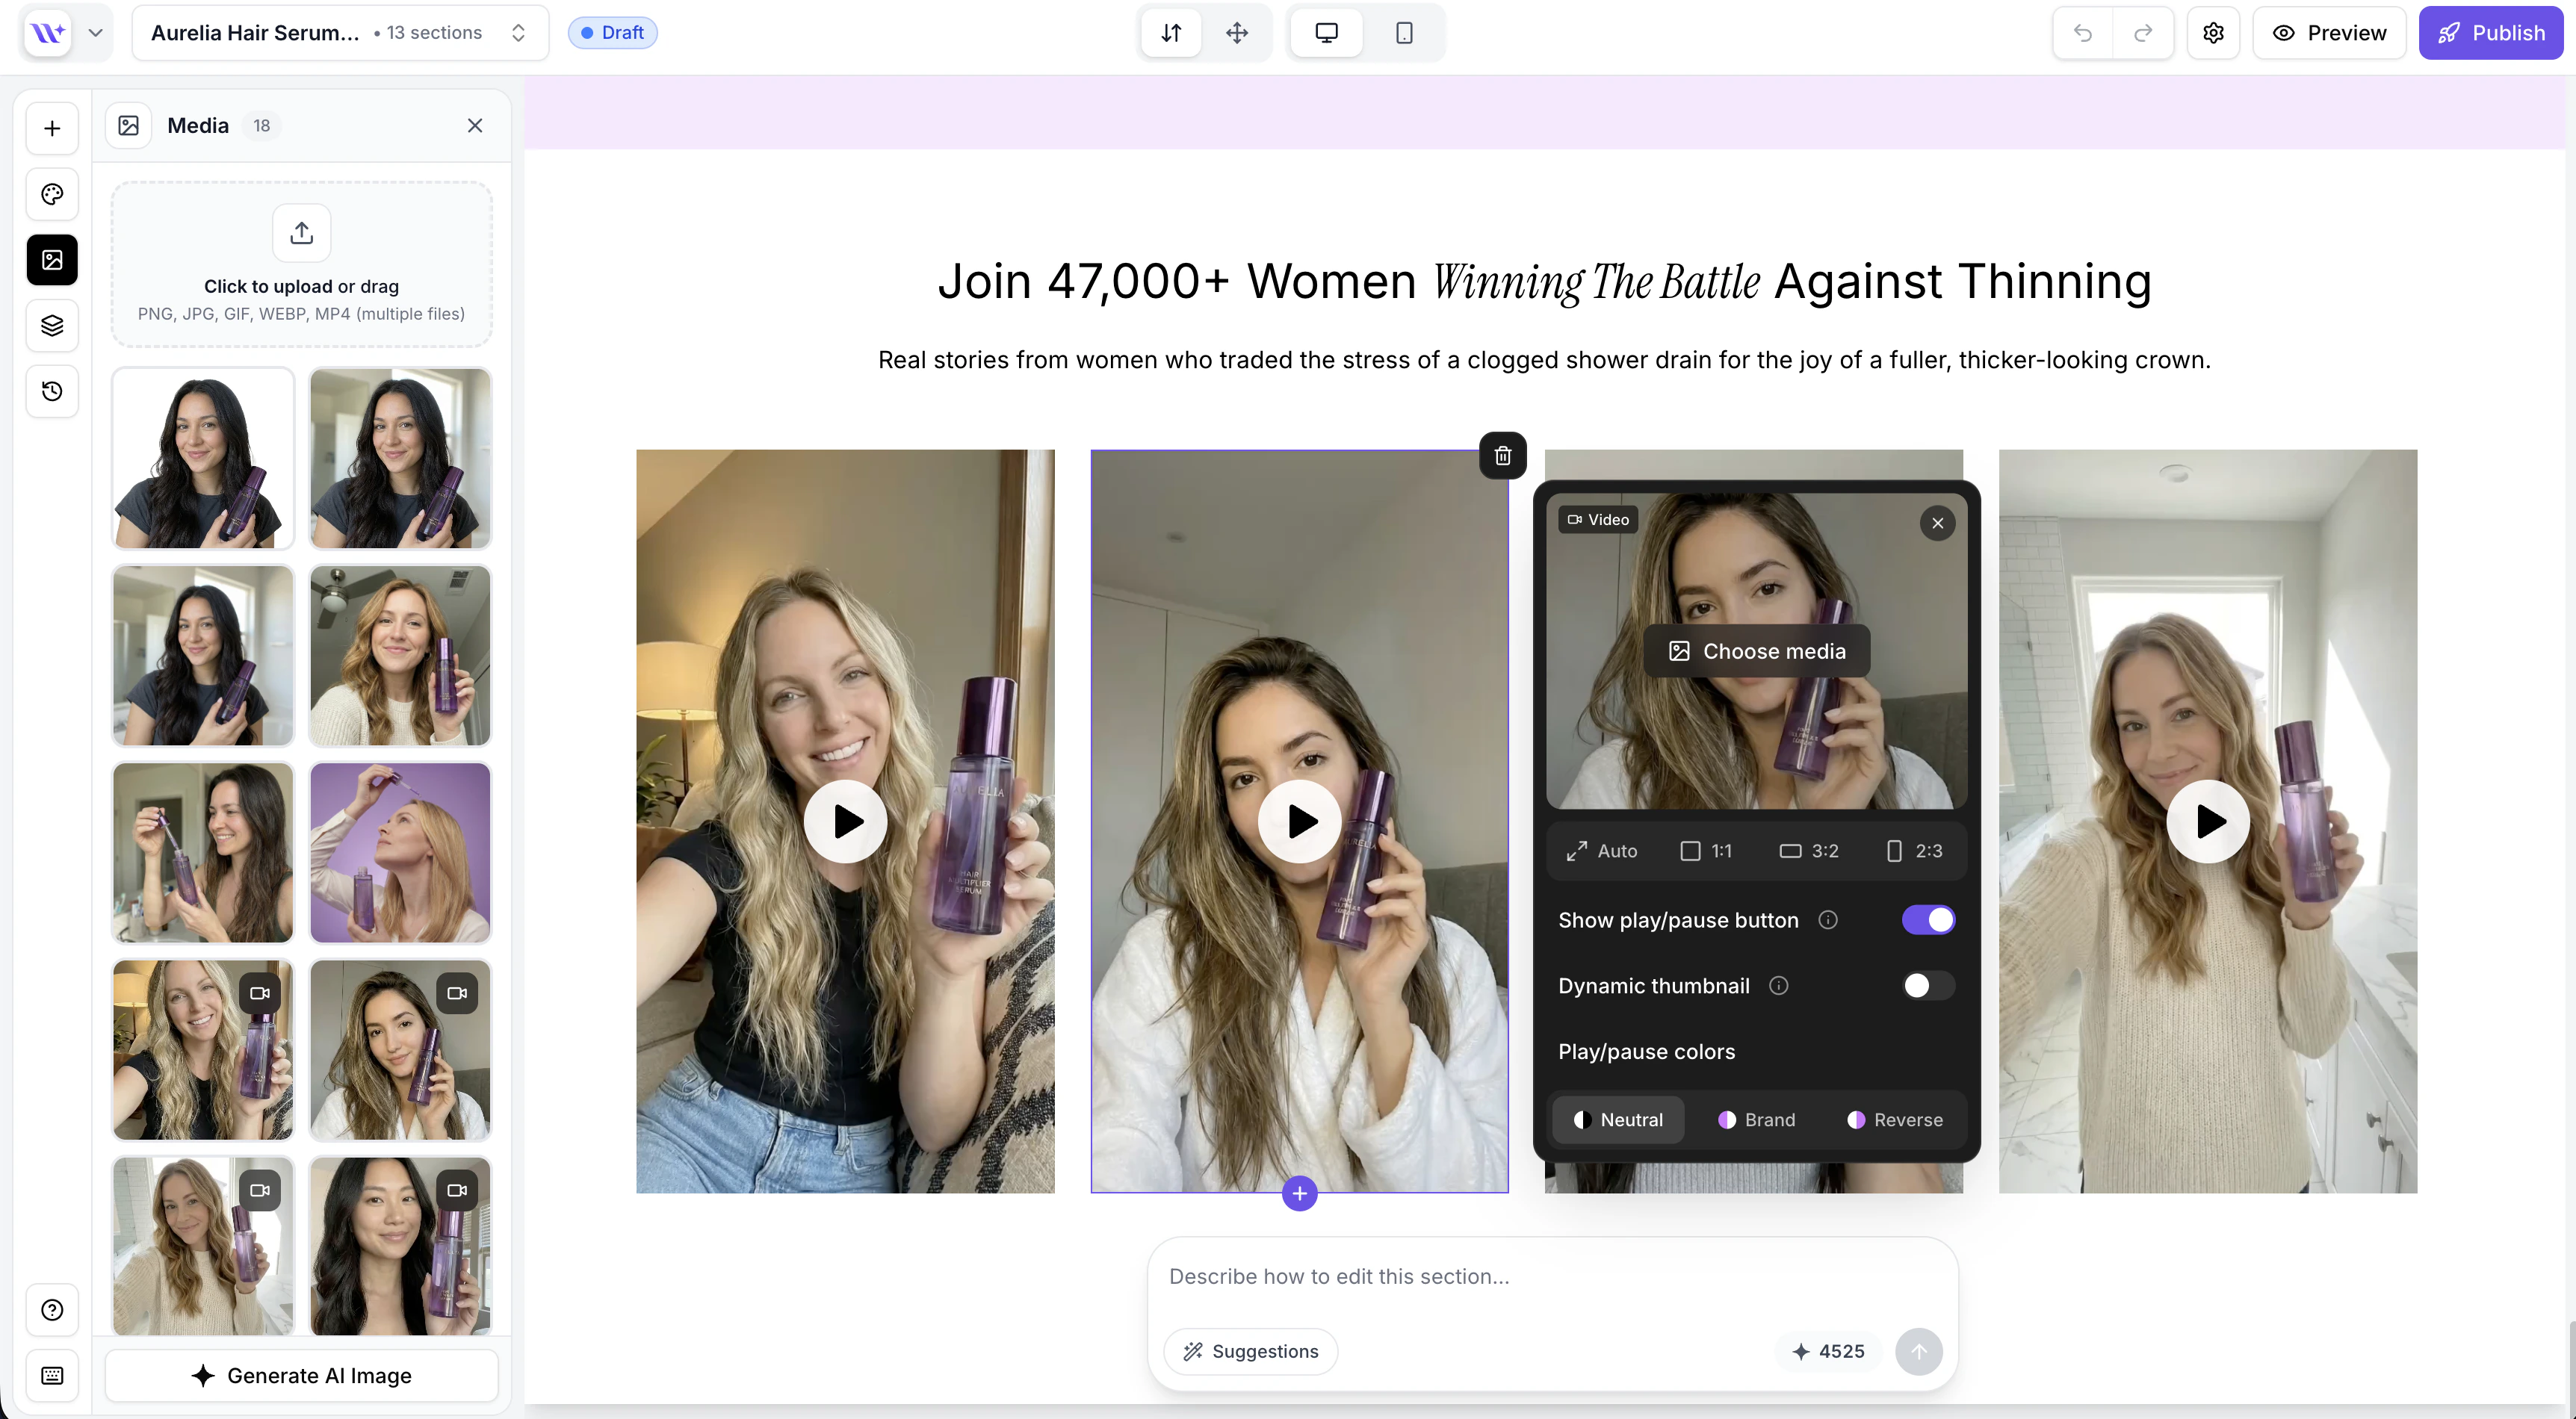
Click any image or video thumbnail in the library. It will be immediately applied to the selected image element in the section.
## Using Media in Sections
There are two ways to use media from your library in sections:
### Select from Library
Click on any image element in the canvas to select it.
The Media Panel opens (or click the media icon to open it manually).
Click any image or video thumbnail in the library. It will be immediately applied to the selected image element in the section.
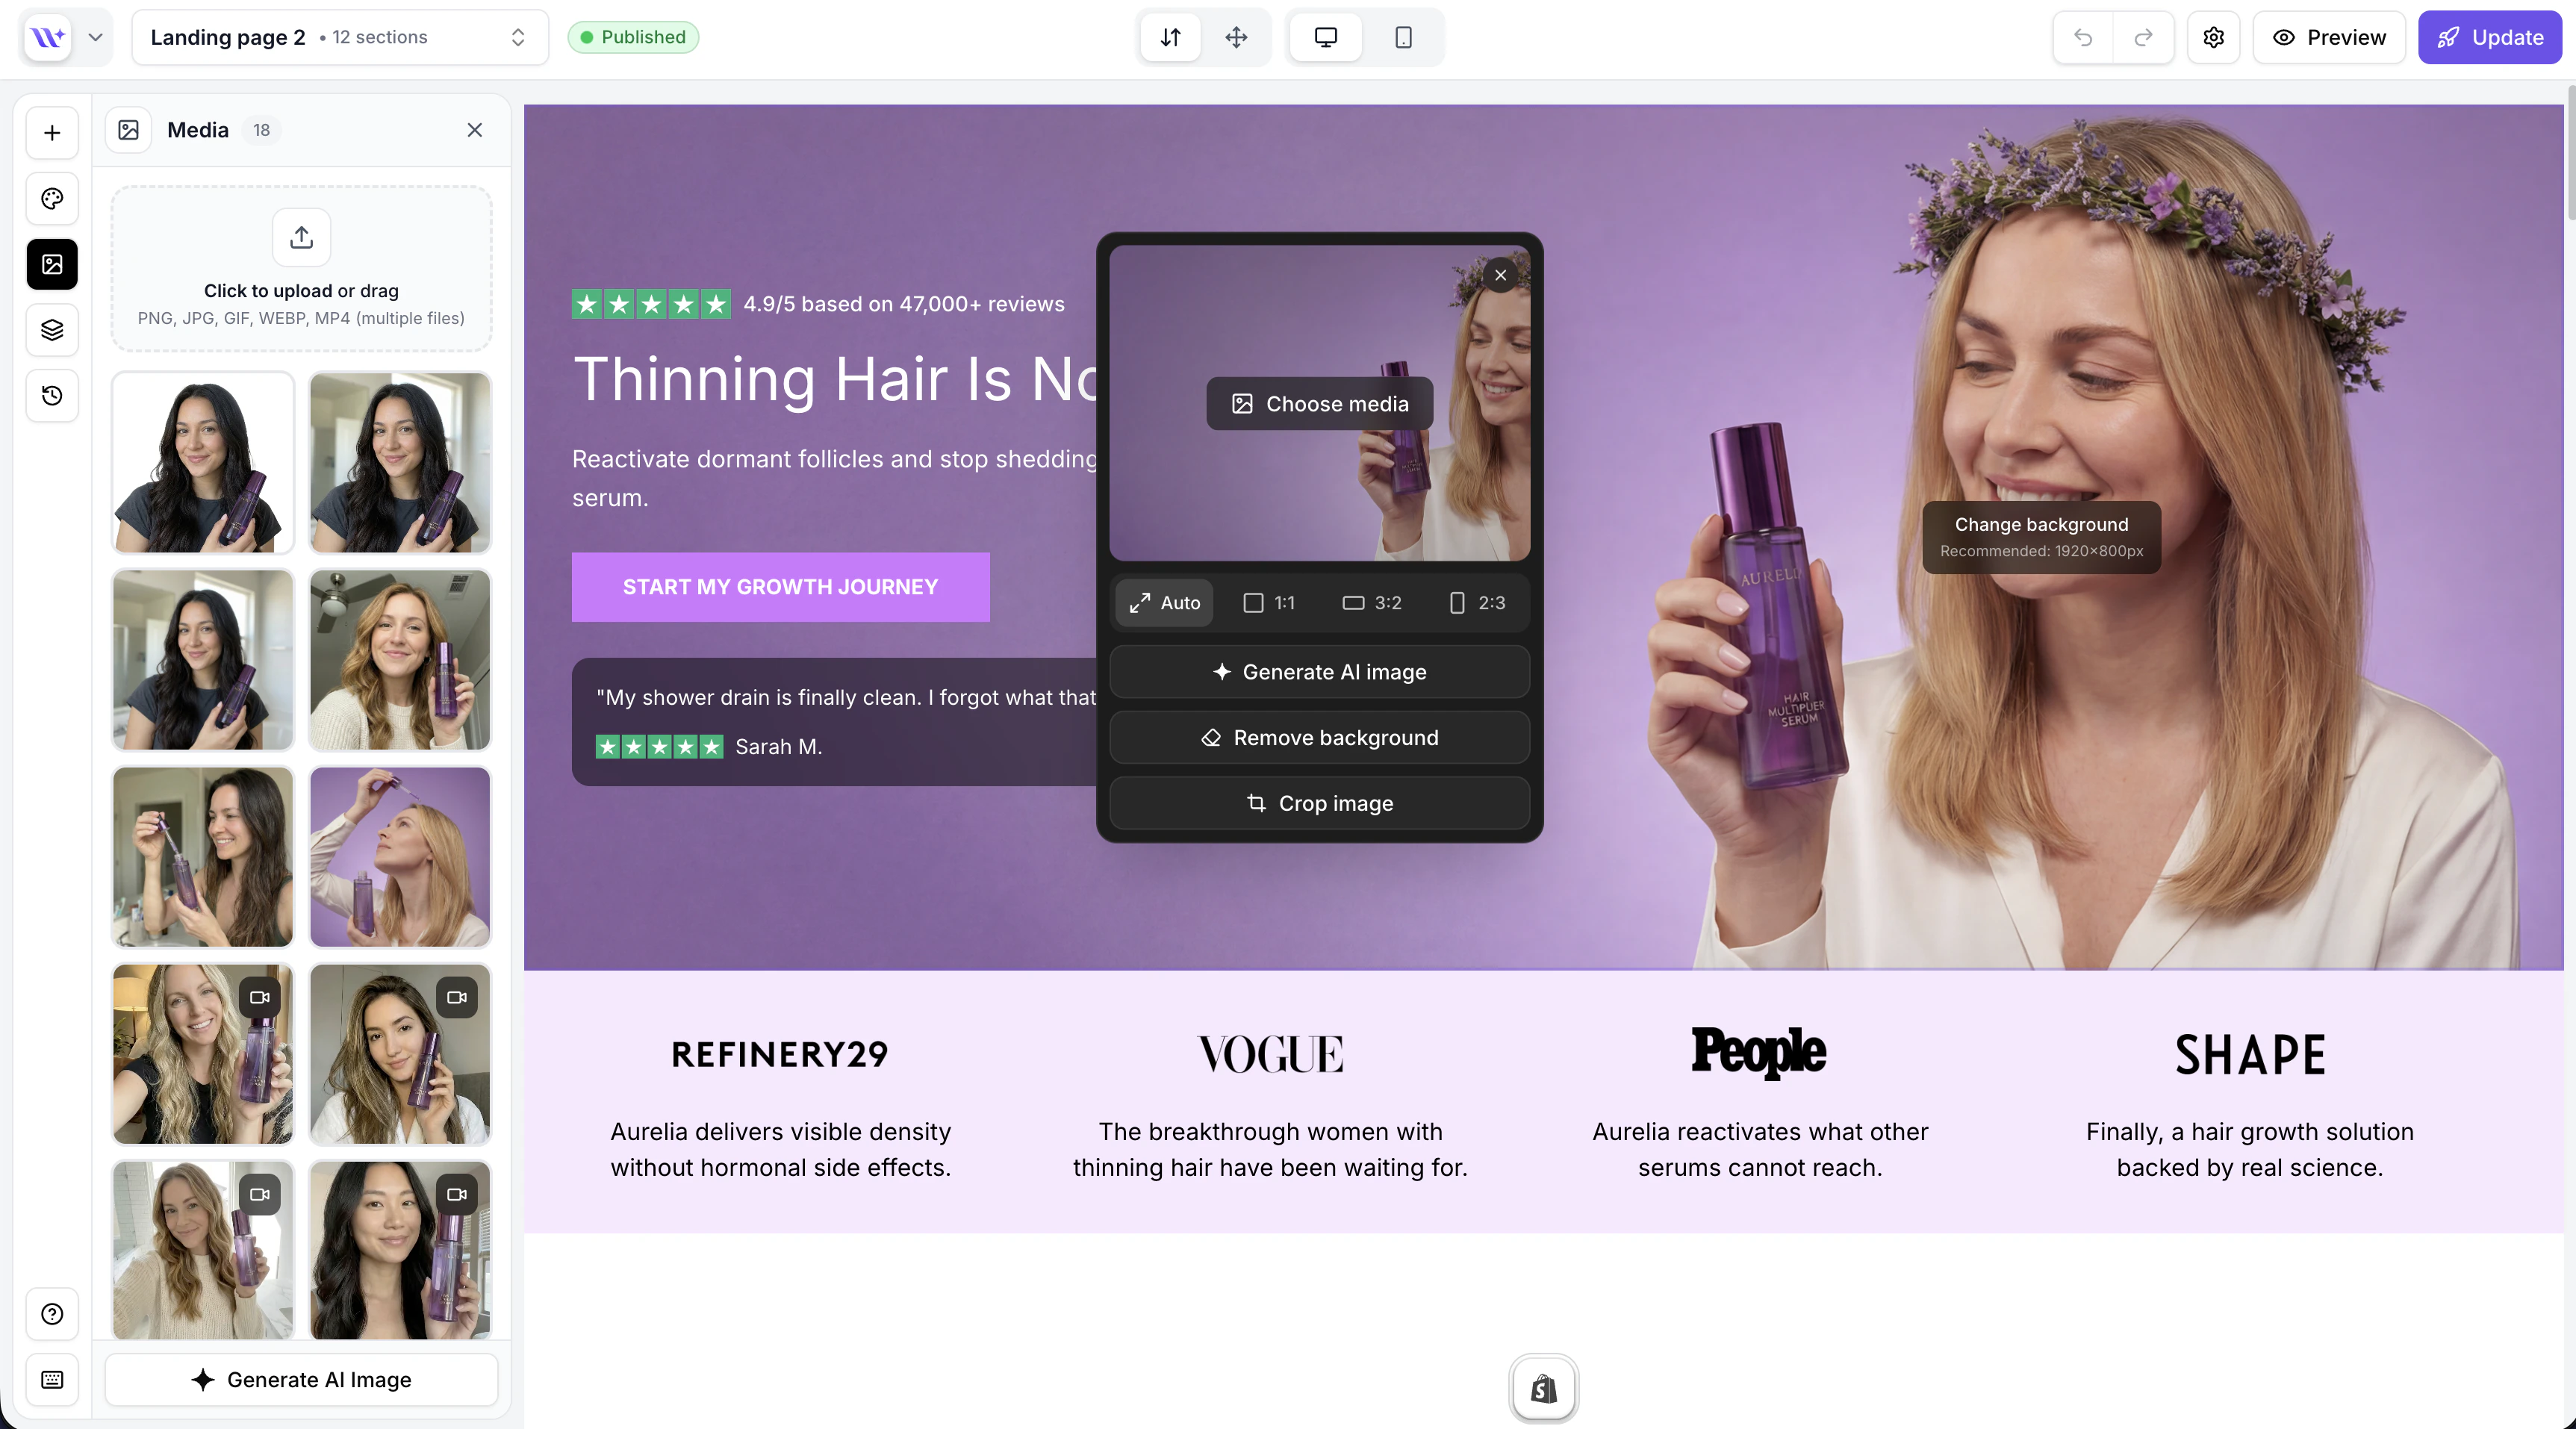 When you click on a different image element while the Media Panel is already open, the panel automatically updates its target. The next file you click will be applied to the newly selected image element.
## Copying Media URLs
To copy a file's CDN URL to your clipboard:
1. Find the file in the media library
2. Hover over the thumbnail
3. Click the copy icon
4. The URL is copied to your clipboard
This is useful when you need to reference the file URL in external tools, custom code, or share the link.
## Deleting Media
To delete a file from your media library:
Locate the file you want to delete in the media library.
Hover over the thumbnail and click the trash/delete icon.
A confirmation dialog appears. Click **Delete** to confirm.
Deleting a media file removes it from the CDN and your library permanently. If the file is currently used in any sections, those sections will show a broken image. Make sure the file is not in use before deleting it.
## AI-Generated Images
Images created with the [AI Image Generation](/ai-features/image-generation) feature are automatically added to your media library with an "ai" source tag. They appear alongside your manually uploaded files and can be used the same way.
When new AI-generated images are added, the media library automatically refreshes to show them.
## Upload Date Tracking
Each file in the media library includes an upload timestamp. Files are sorted by upload date by default, with the newest files appearing first. This makes it easy to find recently uploaded or generated files.
## Tips for Organizing Your Media
Rename files before uploading. Use names that describe the content and purpose: `hero-banner-summer-sale.jpg`, `testimonial-avatar-sarah.png`, `product-detail-side-view.jpg`.
If you have multiple images for a page, upload them all at once using multi-file select or drag-and-drop. This keeps related images grouped together by upload time.
Periodically review your media library and delete files that are no longer used in any pages. This keeps your library organized and easy to navigate.
Instead of searching for stock photos for testimonial sections, use the AI Image Generation avatar library for quick, ready-to-use portrait images at no credit cost.
When you click on a different image element while the Media Panel is already open, the panel automatically updates its target. The next file you click will be applied to the newly selected image element.
## Copying Media URLs
To copy a file's CDN URL to your clipboard:
1. Find the file in the media library
2. Hover over the thumbnail
3. Click the copy icon
4. The URL is copied to your clipboard
This is useful when you need to reference the file URL in external tools, custom code, or share the link.
## Deleting Media
To delete a file from your media library:
Locate the file you want to delete in the media library.
Hover over the thumbnail and click the trash/delete icon.
A confirmation dialog appears. Click **Delete** to confirm.
Deleting a media file removes it from the CDN and your library permanently. If the file is currently used in any sections, those sections will show a broken image. Make sure the file is not in use before deleting it.
## AI-Generated Images
Images created with the [AI Image Generation](/ai-features/image-generation) feature are automatically added to your media library with an "ai" source tag. They appear alongside your manually uploaded files and can be used the same way.
When new AI-generated images are added, the media library automatically refreshes to show them.
## Upload Date Tracking
Each file in the media library includes an upload timestamp. Files are sorted by upload date by default, with the newest files appearing first. This makes it easy to find recently uploaded or generated files.
## Tips for Organizing Your Media
Rename files before uploading. Use names that describe the content and purpose: `hero-banner-summer-sale.jpg`, `testimonial-avatar-sarah.png`, `product-detail-side-view.jpg`.
If you have multiple images for a page, upload them all at once using multi-file select or drag-and-drop. This keeps related images grouped together by upload time.
Periodically review your media library and delete files that are no longer used in any pages. This keeps your library organized and easy to navigate.
Instead of searching for stock photos for testimonial sections, use the AI Image Generation avatar library for quick, ready-to-use portrait images at no credit cost.